Blog, Mono

Mono Monday-Encased in crystal

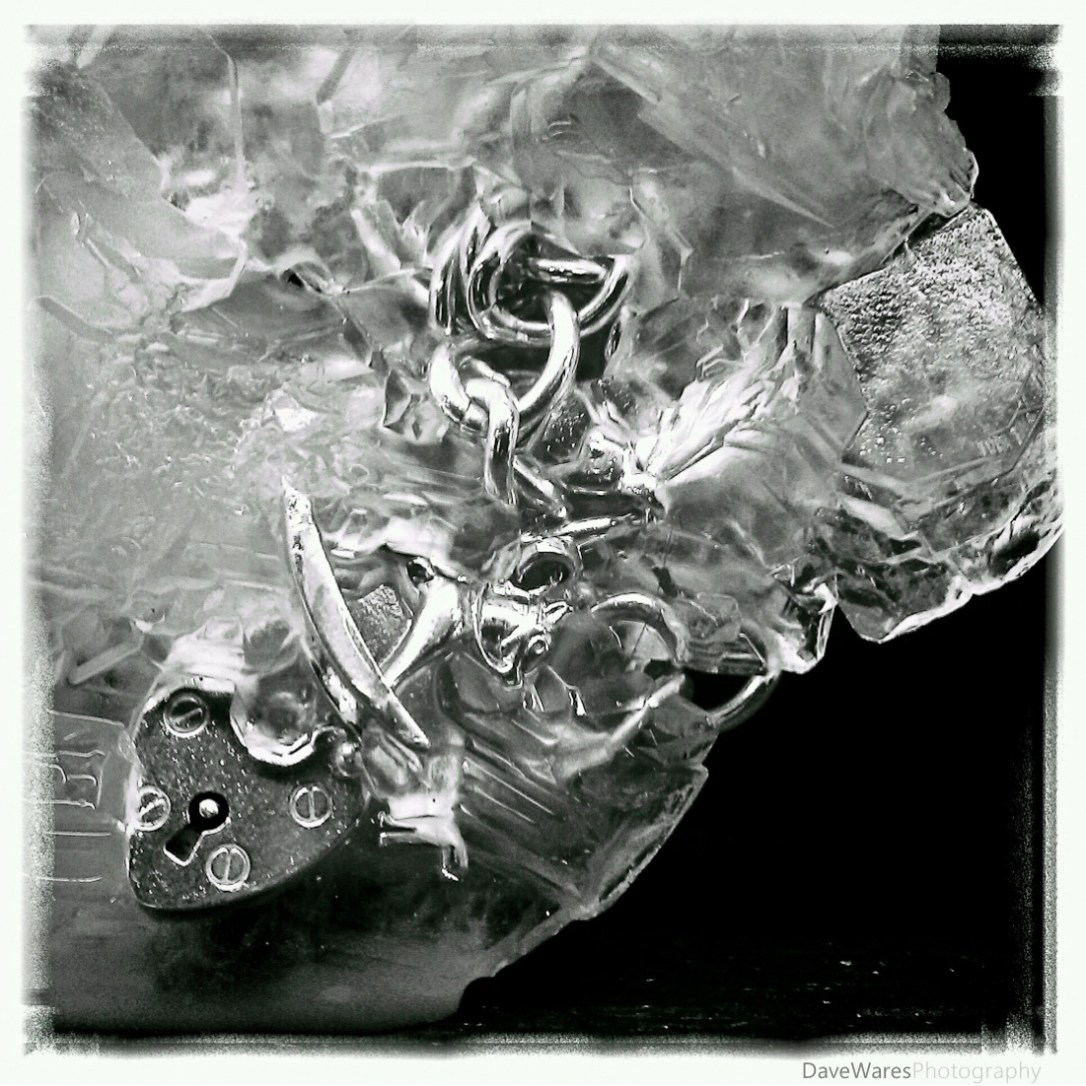
Title – ‘Encased in soda crystal’

Wow, it’s Monday again already. The time seems to be flying by these days.

So I thought I’d offer up something a little different today. After the the first two weeks both being candid street photography I felt a change was needed to mix it up a bit. What you see here is a silver charm bracelet that had been left in a bowl of soda crystals over the course of a weekend. Once the water had evaporated the soda gradually formed crystals around the bracelet ending up in an interesting abstract form. This wasn’t done purposely for  the sake of art, rather it was a happy accident created by a work colleague forgetting to take it out of the bowl before going home.

Being something that happened at work meant that I didn’t have my SLR with me, but I did have my new HTC android phone and this gave me a great opportunity to try and do something a little more creative with it. I used the Vignette app with the Ilford Black and white setting and one of the grunge borders.

‘The best camera is the one you have with you’, so the saying goes.

Which handily allows me to plug a new side project I’ve embarked on based entirely on using my phone for taking pictures, I’m calling it ‘Cellpix’. I’m certainly not the first person to do this but what the heck, I’m going to have fun with it. You can find it at http://davewares.tumblr.com and I’d be very pleased if you could pop on over and take a look.

As always, comments are very welcome. Thanks for stopping by.
Blog, HDR

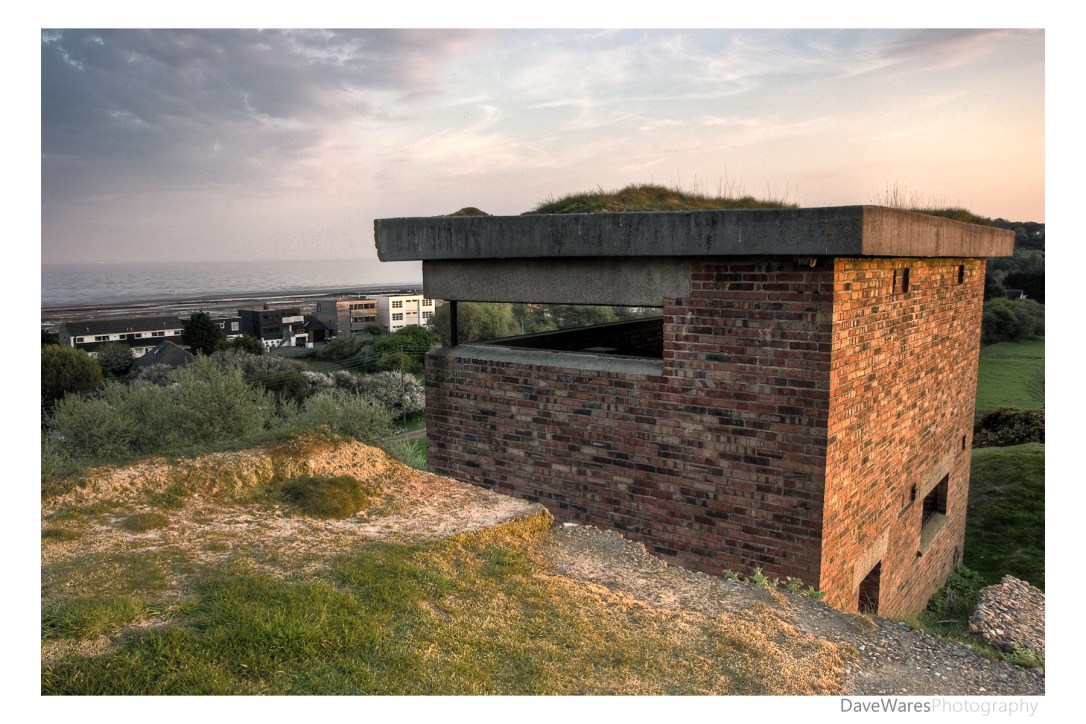
Pett level Pillbox

This past Tuesday our camera club met up at Pett level for an evenings spot of photography along the beach. However, even though throughout the day we’d been blessed with blazing sunshine it didn’t end up giving us (or at least me) that wonderful golden light I’d been hoping for. It just seemed a bit lifeless and just a little too hazy to get anything half decent. Heading up from the beach towards the houses I bumped into another club member and we decided it might be a better idea to head up towards the old World War 2 pillbox. A very good decision this turned out to be too, with just enough golden light hitting the bickwork.

This is one of my favourites from the eve but I took a couple of others both inside and out of this building.  The part you see here is the lookout, but there is also another section that was used for the gun emplacements that we didn’t get to. Another visit me thinks.

A very pleasant evening had by all, rounded off with a nice chat in the pub too. 🙂

Blog, Mono

Mono Monday ‘Tenderness’

Title ‘Tenderness’

Candid photography is not something I usually do but when I saw these two I just had to get the shot. Taken on the Millennium Bridge, with the Tate Modern in the background. I think this type of subject lends itself perfectly to being presented in black and white, giving it that ‘timeless’ quality.

Blog, HDR, Tips

Why HDR?

So I’m not the first to show the benefits of using HDR but I thought I’d do a short post on it anyway. 🙂

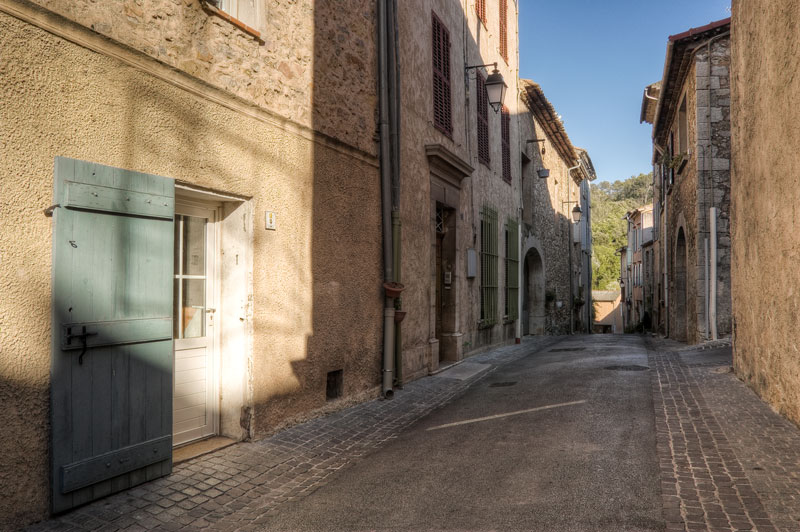
While going through some photos of our holiday to the south of France last summer, I stumbled upon a set of brackets that I hadn’t done anything with, that of an empty street in Provence (above). Now I’ll admit there’s nothing that special about the shot, but there was enough I liked for me to press the shutter. I think it was the beautiful weather and peacefulness that I found pleasing. Whatever my motivation, it shows the usefulness of bracketing your photographs to make an HDR image that  represents a scene more accurately than a single shot can.

These three shots show the different exposures needed to capture all of the elements within the scene. The one on the left is the cameras recommended exposure, the middle is -2EV and is needed to retain detail in the white door which had blown out in the left example, finally the right shot was +2EV and was needed to  capture the areas in shadow. Now to my eye, the areas in shadow on the overexposed image are pretty much as I saw them on the day, so as you can see, due to the huge contrast that my eye compensated for but the camera couldn’t, combining the three shots was the best way to achieve a photo with the tonal range more accurately reproduced.  (Whether you use an HDR program to combine your shots or merge them by hand in a program like Photoshop is up to you). Once I have the tonal range sorted I can then continue to work on an image, giving it the look and feel I have in mind, if I so wish.

The main image was produced using Photomatix Pro with final adjustments done in Lightroom. There are plenty of other HDR software programs out there but it’s up to you to give them a try to see which you prefer, I always seem to come back to Photomatix.

I hope this has been of some use. Like I said, it’s a post to show the benefits of HDR rather than being a tutorial.

Thanks for looking.

Blog, Tips, Urbex

My old style grunge look

(By adding a mono layer to your image you can give your shot a whole new look)

Over the past year I have become know in photography circles for being something of a HDR chap, and for the most part the bulk of my work during 2010 was indeed processed using HDR software. It hasn’t always been that way, in fact I didn’t have any HDR software until January of 2010…Since then I’ve caught the bug and haven’t regretted it one bit. Prior to 2010 I used a different method of giving my Urban exploration work that ‘grunge’ look by blending both colour and mono layers together in Photoshop.

There can be a lot of fiddling about with getting the tones and levels right but the basic idea is this: Open your picture into Photoshop (I’m using Elements) and duplicate the layer, then set the blend mode on the new layer to ‘Screen’, this will lighten the photo. Then right click on that layer and select ‘Merge layer’, you will be back to one layer. Duplicate this layer and convert the new layer to mono using your preferred method. If you use the ‘Convert to Back and white’ tool you will see a range of presets that give different mono looks, such as infra-red, landscape, portrait etc Play around with these and see how the colours react (though you will be seeing black and white). e.g For the picture above I chose to use the infra-red as it darkened the blues and brightened the green areas. Now you have both a colour and mono layer in the layers pallet. With the mono layer still selected, change the blend mono to ‘Multiply’. What you should now see is a much more contrasty and dirty looking picture and if you’re happy with the way it looks then flatten the layers and save. I find that for the most part additional adjustments are required but these vary from picture to picture, usually I’ll change the opacity of the mono layer or use adjustment layers to change the brightness and contrast for each layer. Sometimes I will flatten the layers and use the highlight/shadow tool to balance the image.

As you can see it is not an exact science, but with a little Photoshop know-how you can give your shots that dirty grungy look that some derelict places seem to benefit from, at least in my opinion.

Here is a shot I did a couple of years back using the same method.

Blog, Landscapes, Tips

The Early Bird

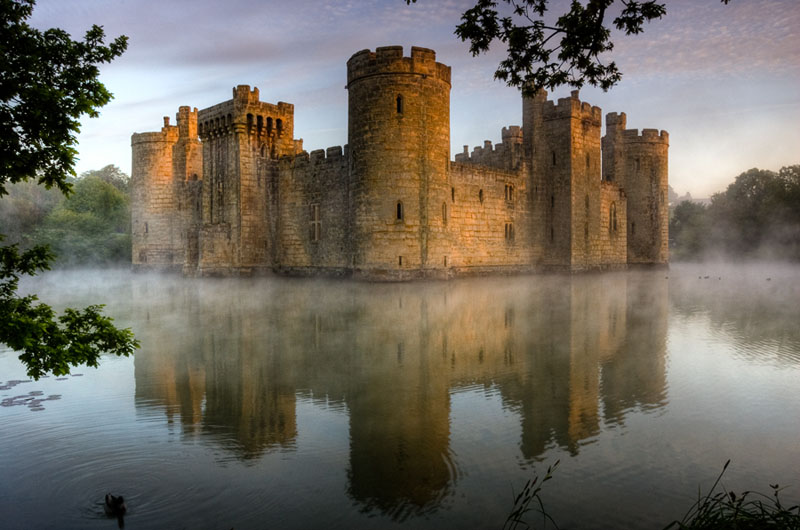
Bodiam Castle shot moments before sunrise giving a lovely orange glow reflected on the clouds.

The early bird catches the worm, and the same goes for photographers if you want to get out and take great pictures. There is no hard and fast rule but generally speaking the best time to get a great quality of light is to be out at either end of the day. From dawn till just after sunrise, and from about an hour either side of sunset.

Get there early!

Of course there are going to be differing factors throughout the year, such as shorter days during winter where the sun is also lower, and longer days during the summer months where the sun gets much higher and stronger, but whatever time of the year I would always recommend getting out as early as is necessary. Find out when sunrise is and get there at least an hour before, this will give you time to walk around to find the best spot and set your gear up. If you’re ready to go with time to spare you’ll be much more relaxed giving you the opportunity to take in your surroundings. I think that if you can immerse yourself with what’s going on around you, the feeling you get will translate to the picture and hopefully the viewer.

Take these pictures for example. I arrived whilst it was still dark thus giving me time to have a good walk around to view all the angles and consider different compositions. Once I had the pictures in my head it was just a matter of watching the sky to see where the first signs of light would come from. The low morning sun gives beautiful warm tones and because it’s low it casts shadows that define elements in the scene, giving a greater sense of shape and depth. The shot above was bracketed and tonemapped so I could get some detail in the stonework which the camera couldn’t record in a single exposure but my eye could see perfectly. I could’ve used an ND grad to help balance the sky but this would have darkened the tops of the towers. Even when doing an HDR image it is important to keep the shadows and not get carried away with balancing all the elements in the scene just because the software can make it possible.

The shot below (taken on a different day, not bracketed) shows the light just after sunrise, with the warmth of the sun being just enough to evaporate the water giving the scene a wonderful moody atmosphere. It just wouldn’t have had the same feel and impact had it been taken during the middle of the day, and I certainly wouldn’t have got all the steam coming from that moat.

So get up early and don’t be tempted by the warmth of that duvet…You’ll be rewarded.